
Installation
Download and install AstroNav MC
Section titled “Download and install AstroNav MC”- Open the AstroNav MC releases page.
- Download the most recent release for your operating system:
- On Windows, download the Windows installer or executable.
- On Linux, download the Linux package or executable.
- Complete the installation wizard and open AstroNav Mission Control.
Windows protected your PC
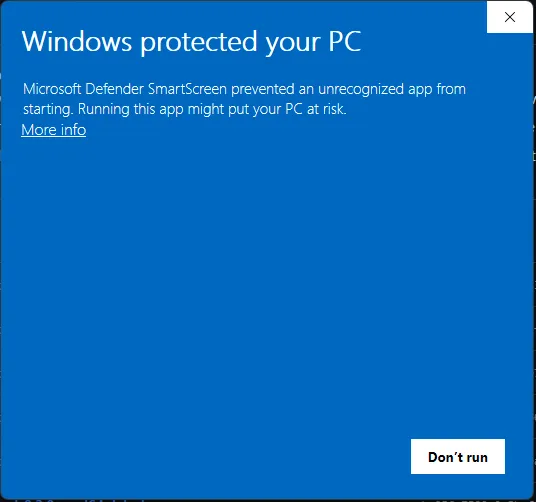
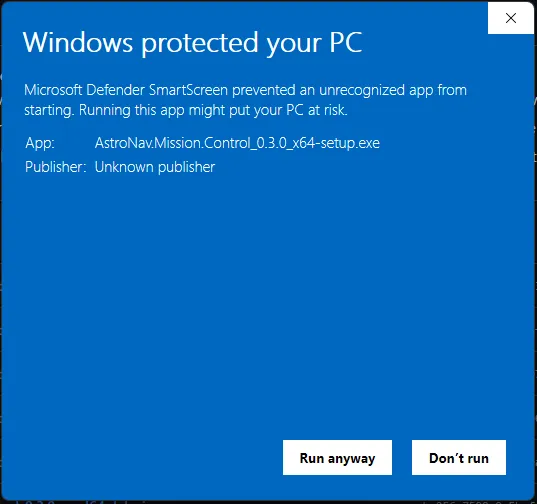
Section titled “Windows protected your PC”When you start the installer, Windows may show a blue Windows protected your PC screen. Microsoft Defender SmartScreen shows this for apps that are not digitally signed yet, which is why it lists the publisher as Unknown publisher. It does not mean anything is wrong with the file.
AstroNav MC is safe to install and use when you downloaded it from the official AstroNav MC releases page.
-
Select More info.
-
Check that App shows the AstroNav Mission Control installer, for example
AstroNav.Mission.Control_0.3.0_x64-setup.exe. -
Select Run anyway.
Update AstroNav MC
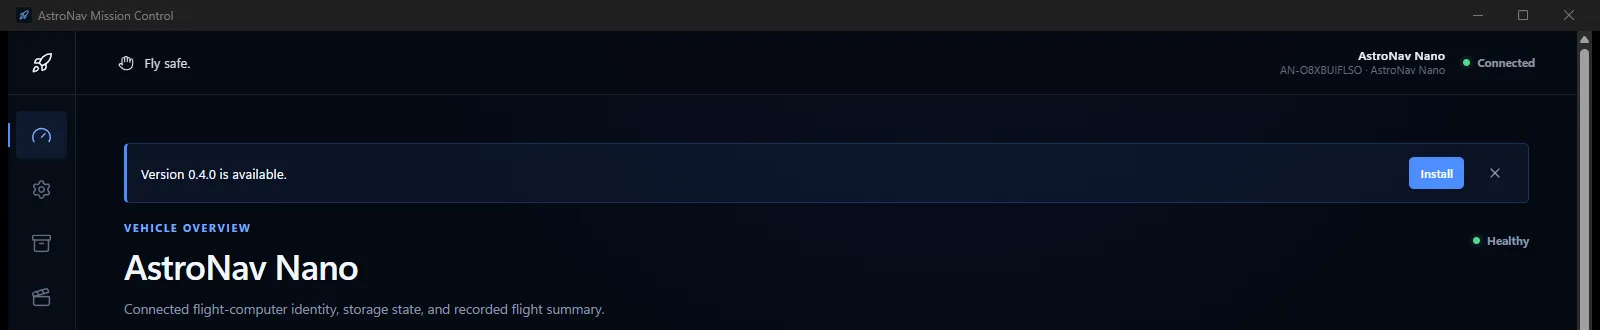
Section titled “Update AstroNav MC”AstroNav MC checks for a newer version of itself when it starts. When one is available, a banner shows Version x.y.z is available at the top of the overview page.
- Finish any settings save, flight import or video export.
- Select Install in the banner and wait for AstroNav MC to update and restart.
Select × to hide the banner and update later. The current version is shown at the bottom of the sidebar.
This banner updates the AstroNav MC application on your computer. Firmware for the Nano itself is covered in Firmware update.
Connect the AstroNav Nano
Section titled “Connect the AstroNav Nano”- Connect the AstroNav Nano to your computer over USB and put it in USB storage mode. For the physical connection, see Firmware update.
- Make sure the operating system has mounted the device.
- Open AstroNav MC and wait for discovery to finish.
AstroNav MC automatically checks mounted volumes for a compatible Nano. A compatible device exposes a root-level Settings.ini, expected AstroNav identification data, and a logs directory. When it connects, AstroNav MC also checks whether newer flight-controller firmware is available. No manual device selection is needed when only one compatible device is connected.
Connection status
Section titled “Connection status”The top-right status reports the current connection:
- Connected - a device is selected and healthy.
- Warning or Critical - a device is selected but reports that health state.
- Scanning - discovery is still searching mounted volumes.
- Select device - more than one compatible device is connected.
- Offline library - no compatible device is available, but imported flights can still be opened.
- Ejected · safe to unplug - the Nano was ejected with the Eject button and has applied its settings.
Next to a connected device, the Eject button safely ejects the Nano. See Apply settings: eject the device.
When more than one Nano is connected, select the intended device by its model, serial number, mount label, and health status.
If the Nano is not detected
Section titled “If the Nano is not detected”- Confirm that it is powered over USB and in USB storage mode.
- Check that the operating system mounted the device.
- Reconnect the Nano and restart AstroNav MC.
- If the issue continues, record any displayed error before asking for support.
The application identifies a device by its AstroNav files and serial number, not only by its removable-drive label. If a device disappears during an operation, reconnect it and retry.