
Data overlay
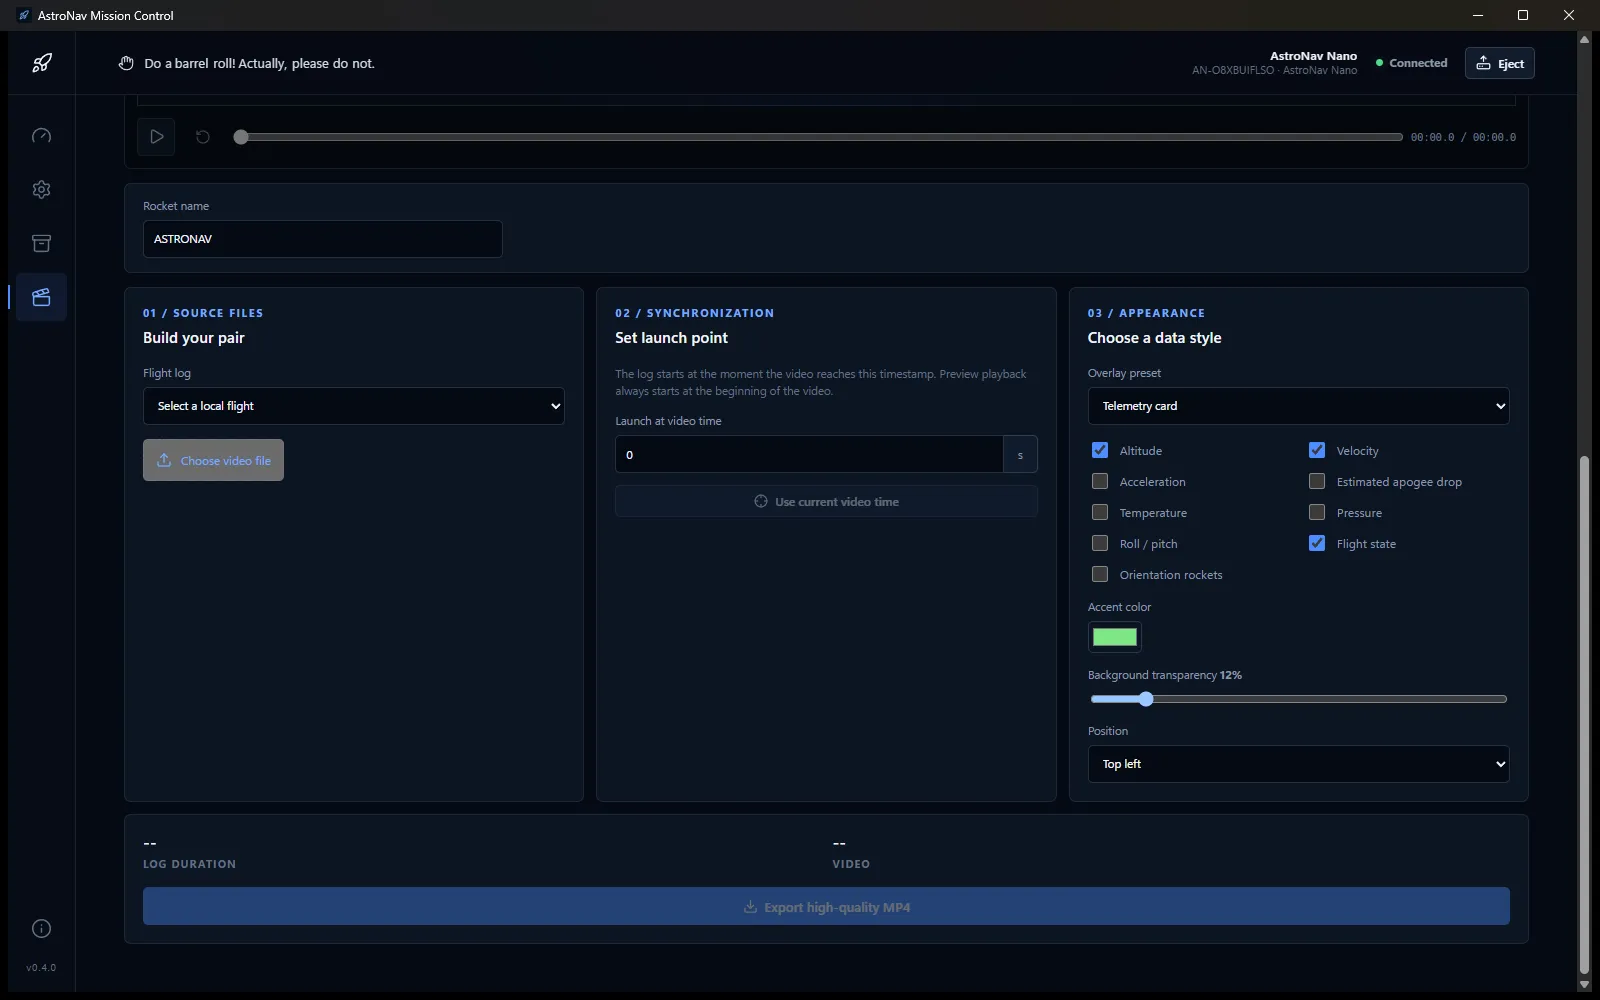
The Overlay studio pairs a video of your launch with the flight log from the Nano. You line up the moment of launch, choose which data to show, and export a finished MP4 with the telemetry drawn over the video. Open it with the last icon in the sidebar.
Before you start
Section titled “Before you start”- The flight must be in the local archive. Use Import locally in Flight logs readout first; the flight log list only shows local flights.
- Have the launch video on your computer.
1. Build your pair
Section titled “1. Build your pair”- Enter a Rocket name to show in the overlay.
- Under Flight log, select the local flight.
- Select Choose video file and pick the launch video.
The bottom panel shows the Log duration and Video length once both are loaded.
2. Set the launch point
Section titled “2. Set the launch point”The flight log starts at the moment the video reaches the Launch at video time value, in seconds.
- Play or scrub the video in the preview at the top of the page to the moment of liftoff.
- Select Use current video time, or type the time in seconds.
- Play the preview to check that the data follows the video. Preview playback always starts at the beginning of the video.
3. Choose a data style
Section titled “3. Choose a data style”| Option | What it does |
|---|---|
| Overlay preset | The layout of the overlay, for example Telemetry card |
| Data fields | Choose what to show: altitude, velocity, acceleration, estimated apogee drop, temperature, pressure, roll/pitch, flight state and orientation rockets |
| Accent color | Color used for highlights in the overlay |
| Background transparency | How see-through the overlay background is |
| Position | Where the overlay sits in the video, for example Top left |
4. Export
Section titled “4. Export”Select Export high-quality MP4 and choose where to save the video. Keep AstroNav MC open until the export is done. Eject waits for a running video export to finish.